
Hexo + GitHub搭建个人博客

Hexo + GitHub搭建个人博客
SoniaChen安装hexo
1.前提准备:
-
安装git
brew install git验证
git --version -
安装node.js
brew install node
2.安装
npm install -g hexo-cli3.创建博客文件夹并初始化
hexo init
npm install
4.本地启动
hexo g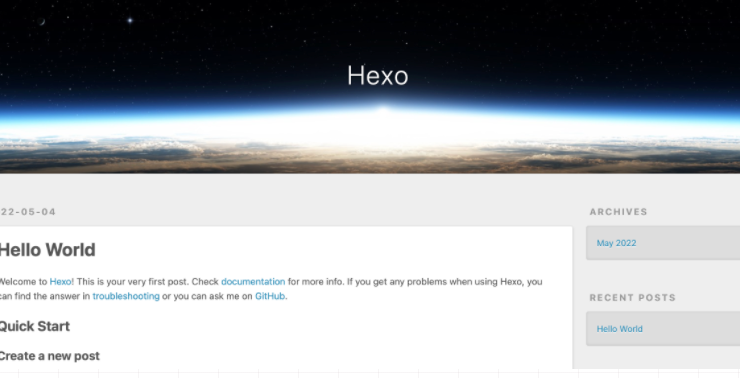
hexo s访问本地链接:http://localhost:4000/
显示如下页面,表示安装成功
安装next主题
hexo官网主题:https://hexo.io/themes/
这里以next为例
1.在创建文件夹下安装主题
git clone https://github.com/theme-next/hexo-theme-next themes/next2.修改文件夹下的_config.yml文件
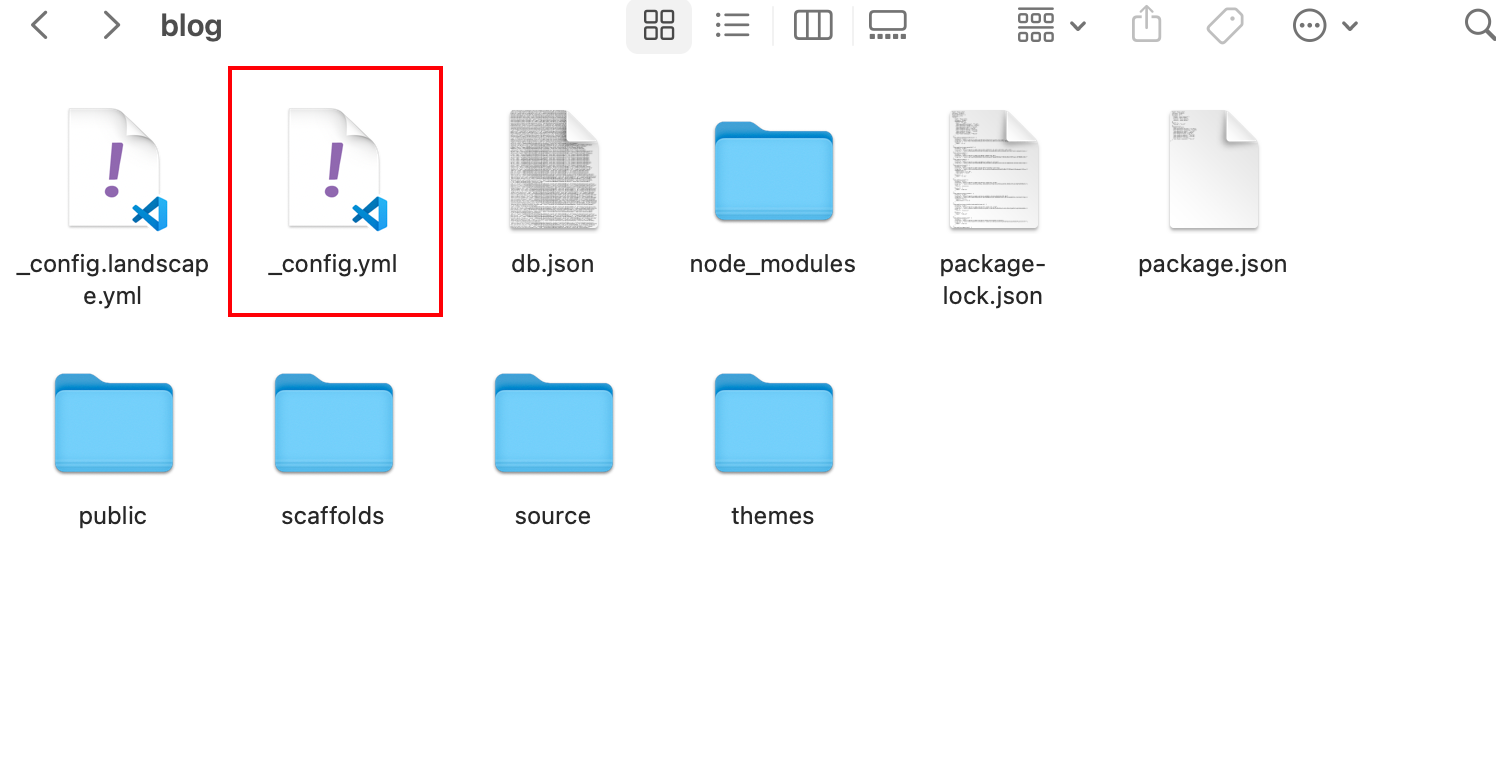
修改theme为next
# Extensions
## Plugins: https://hexo.io/plugins/
## Themes: https://hexo.io/themes/
theme: next
再次访问页面:
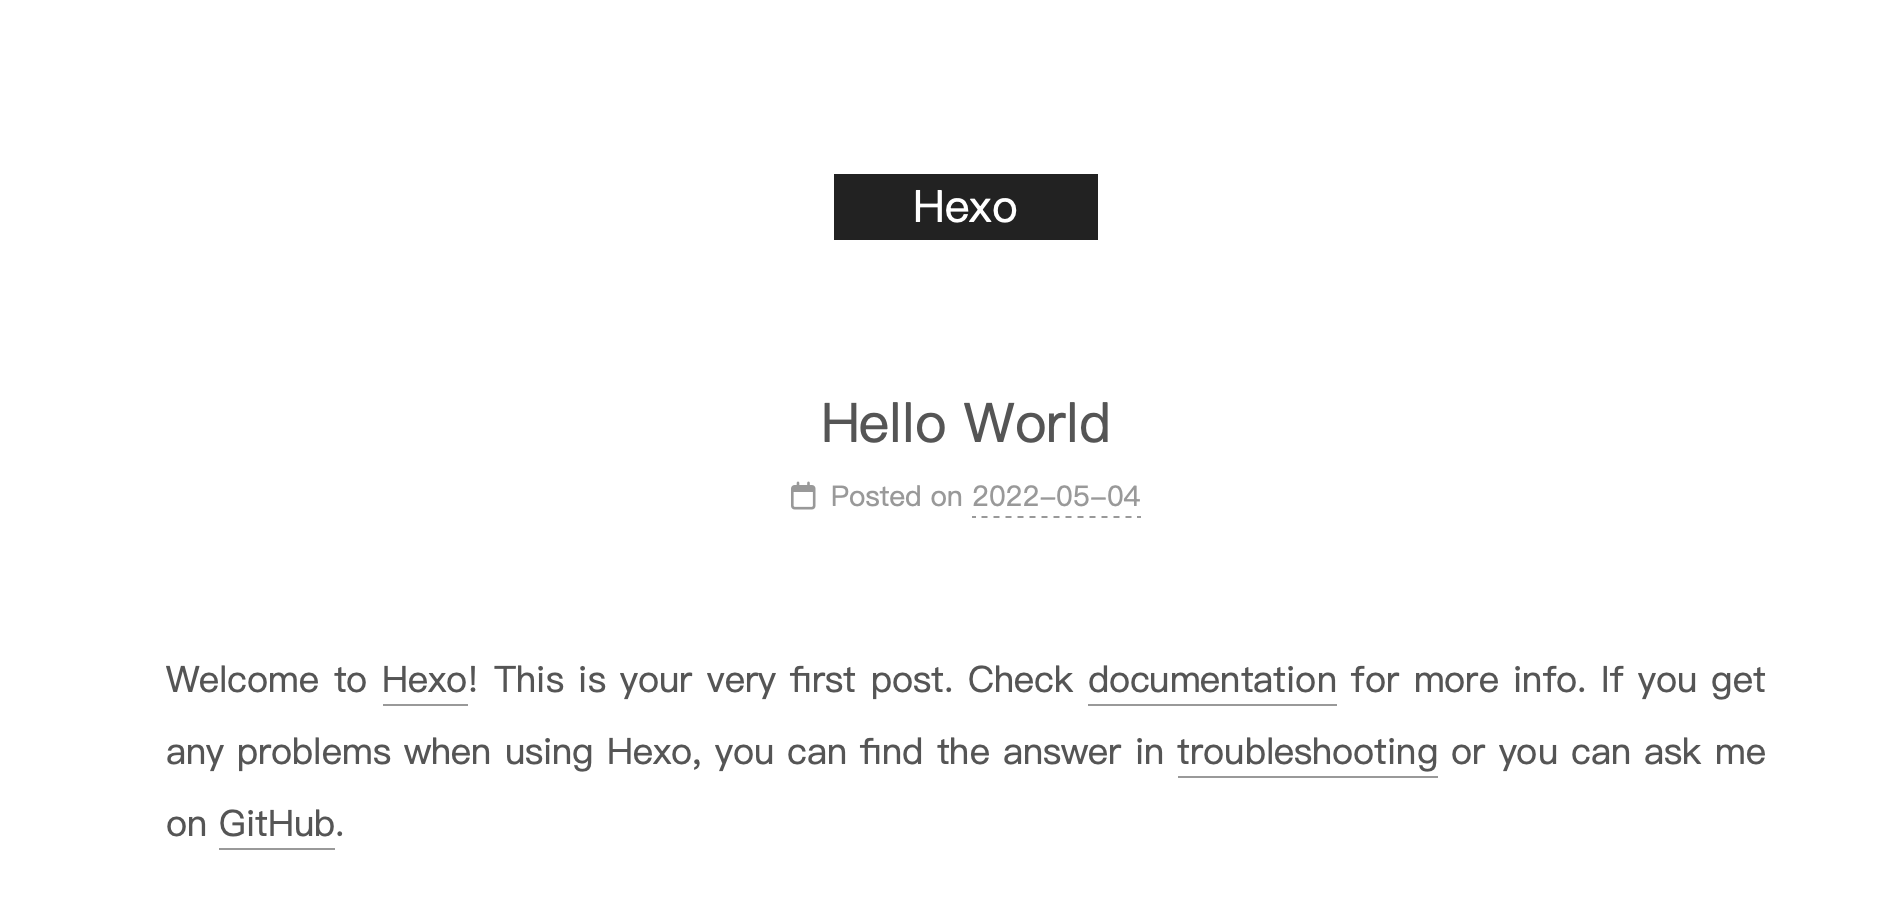
表示next主题安装成功
部署到github仓库
1.创建仓库
仓库名严格按xxx.github.io来(xxx为github用户名 且 小写!

2.配置SSH
如果已经配置过就跳过。
生成SSH key
ssh-keygen -t rsa -C 你的邮箱这个邮箱是github绑定的邮箱
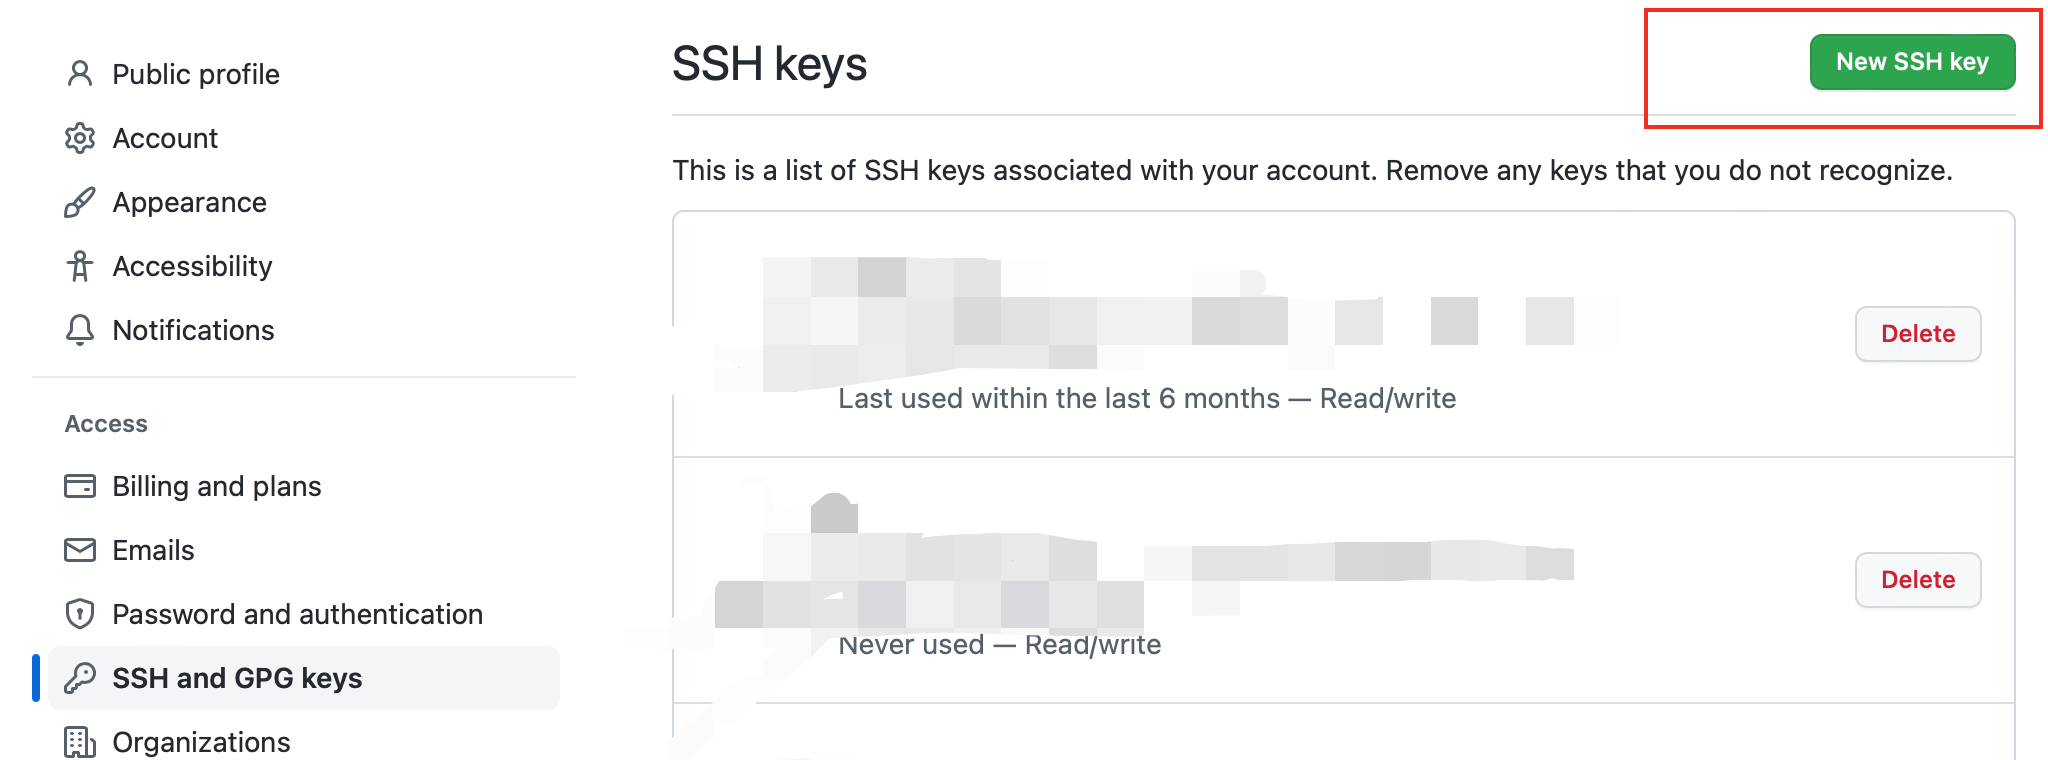
然后登陆github,在Settings里面的SSH and GPG keys里面添加new SSH key
验证是否成功
ssh -T git@github.com
3.部署到github
安装git部署插件
npm install hexo-deployer-git --save打开_config.yml文件,地步修改部署配置
# Deployment
## Docs: https://hexo.io/docs/deployment.html
deploy:
  type: git
  repo: git@github.com:youname/youname.github.io.git
  branch: master
保存后终端执行
hexo clean
hexo g
hexo d
在浏览器输入xxx.github.io就可以看到自己的一个博客了
常用的hexo命令
npm install hexo -g #安装Hexo
npm update hexo -g #升级
hexo init #初始化博客

命令简写
hexo n “我的博客” == hexo new “我的博客” #新建文章
hexo g == hexo generate #生成
hexo s == hexo server #启动服务预览
hexo d == hexo deploy #部署

hexo server #Hexo会监视文件变动并自动更新,无须重启服务器
hexo server -s #静态模式
hexo server -p 5000 #更改端口
hexo server -i 192.168.1.1 #自定义 IP
hexo clean #清除缓存,若是网页正常情况下可以忽略这条命令


喜欢这篇文章的人也看了

评论
匿名评论隐私政策
✅ 你无需删除空行,直接评论以获取最佳展示效果